May AC Startup Checklist for Woodburn OR Homeowners
May is the ideal month for Woodburn homeowners to start their air conditioning systems before summer heat arrives. Begin by checking your thermostat settings, replacing air filters, and inspecting outdoor units for winter damage. Clear debris from around the condenser, verify electrical connections are secure, and test the system's cooling capacity. Schedule professional maintenance if you notice unusual noises, poor airflow, or inadequate cooling performance during initial startup.
Step 1: Check and Replace Your Air Filter
Start your AC startup process by examining the air filter, which likely accumulated dust and debris during months of inactivity. A dirty filter restricts airflow and forces your system to work harder, increasing energy costs and potentially causing damage. Remove the filter from your indoor unit and hold it up to light - if you can't see through it clearly, replacement is necessary.
Choose the correct filter size and MERV rating for your system. Most residential units perform well with MERV 8-11 filters, which balance air quality improvement with proper airflow. Higher MERV ratings can restrict airflow in systems not designed for them. In Woodburn's spring climate, consider upgrading to a pleated filter that captures more allergens as trees and plants begin their growing season.
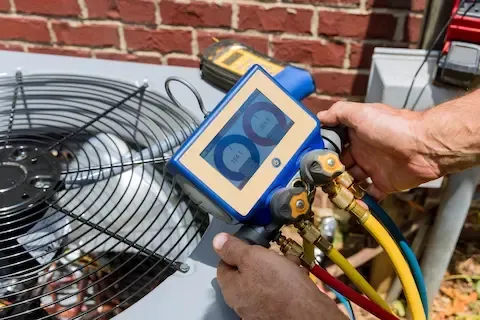
Step 2: Inspect Your Outdoor Condenser Unit
Walk around your outdoor condenser unit and look for signs of winter damage or debris accumulation. Remove leaves, branches, grass clippings, and any items that may have blown against the unit during Woodburn's winter storms. Check for bent fins on the condenser coils - these delicate aluminum strips can be straightened carefully with a fin comb if the damage is minor.
Examine the unit's foundation and ensure it remains level and stable. Ground settling during Oregon's wet winter months can cause units to tilt, affecting refrigerant flow and compressor operation. Look for rust, corrosion, or damage to the electrical connections and refrigerant lines. If you notice any ac repair issues during this inspection, address them before proceeding with startup.
Step 3: Clean the Condenser Coils and Surrounding Area
Turn off power to your AC unit at both the outdoor disconnect switch and the circuit breaker. Remove the top panel or fan guard to access the condenser coils. Use a garden hose with moderate pressure to spray the coils from inside out, removing dirt, pollen, and debris that accumulated over the dormant season.
Avoid using high-pressure washers or aggressive cleaning methods that can damage the delicate fins. For stubborn buildup, use a soft brush or commercially available coil cleaner. Clear vegetation and maintain at least two feet of clearance around the entire unit. Trim back any shrubs or plants that grew too close during Woodburn's growing season, as restricted airflow reduces system efficiency significantly.
Step 4: Test Your Thermostat Settings and Programming
Replace thermostat batteries if your unit uses them, even if they appear functional. Old batteries can cause erratic behavior or system failures during peak cooling season. Review your thermostat's programming and adjust settings for the upcoming warmer months. Set the temperature a few degrees higher than your winter heating settings to test cooling mode activation.
For programmable thermostats, update your schedule to reflect longer daylight hours and changing occupancy patterns. Consider setting the temperature higher when away from home and programming it to cool down before your return. Smart thermostats can learn your preferences and adjust automatically, but verify they're connected to Wi-Fi and functioning properly after months of heating-only operation.
Step 5: Restore Power and Perform Initial System Test
Turn the power back on at both the circuit breaker and outdoor disconnect switch. Allow the system to sit for at least 24 hours before starting if it's been off all winter - this gives the compressor oil time to settle. Set your thermostat to cooling mode and lower the temperature several degrees below the current indoor temperature to trigger system startup.
Listen for unusual noises during startup, including grinding, squealing, or rattling sounds that weren't present last season. Monitor airflow from your vents and check that all registers are open and unobstructed. Feel the air coming from vents - it should gradually become cooler as the system runs. If you notice any problems during this test, consider ac repair services before the busy summer season begins.
Step 6: Monitor System Performance and Efficiency
Run your system for 15-20 minutes and check that cold air is flowing consistently from all vents. Measure the temperature difference between supply and return air - it should be 14-20 degrees when the system is running properly. Walk around your home to ensure all rooms are receiving adequate airflow and cooling.
Check your outdoor unit while it's running - the fan should turn smoothly and quietly, and you should feel warm air being expelled from the top of the unit. Ice formation on refrigerant lines or the evaporator coil indicates problems that require professional attention. Monitor your first few utility bills to establish baseline energy usage for the cooling season.
Step 7: Schedule Professional Maintenance if Needed
If your initial testing reveals any concerns, or if your system is over five years old, consider scheduling professional maintenance before Woodburn's summer heat arrives. Professional technicians can check refrigerant levels, test electrical components, lubricate moving parts, and identify potential problems before they become costly repairs.
Many HVAC companies in the Woodburn area offer spring tune-up specials during May, before the busy summer season begins. Professional maintenance can improve efficiency by 5-15% and extend your system's lifespan significantly. Document any maintenance performed and keep records for warranty purposes and future service appointments.
Step 8: Prepare for Peak Cooling Season
Stock up on replacement air filters so you can change them regularly throughout the cooling season - typically every 30-60 days depending on usage and local air quality. Create a maintenance reminder schedule for monthly filter checks and quarterly outdoor unit cleaning.
Consider upgrading to a programmable or smart thermostat if you're still using a basic model, as proper temperature control can reduce cooling costs significantly. Review your home's insulation and weathersealing, particularly around windows and doors, to maximize your AC system's efficiency during Woodburn's warmer months. Ensure window treatments and ceiling fans are ready to supplement your cooling system and reduce overall energy consumption.
